back to index
Add a Cover to any Tear Pages Presentation
The cover is a vital part if identifying specifically which book the Tear Pages content presents. Tear Pages Live! allows the user to add the cover to any brochure and select specifically where to place it.
 Add a Cover While Creating a New Brochure
 Add a Cover to an Existing Brochure
To add a cover WHILE creating a NEW Brochure:
- Click on the View Tab to view directory. Click here for steps on how to "Go To A Specific Page of Heading".
Example 1 - View Tab

- Click on the Export Button once a heading or page is selected.
Example 2 - Export Button

- Select the Brochure Tab. (See Example 3)
- Select Heading or Page from the drop down under Type. Click here for steps on how to add a cover to an existing brochure.
- Select the check box next to "Add current cover as first page of insert".
Example 3 - Adding a Cover

- Name the Brochure and click on the Save Button.
- Click on the Tear Pages Tab to review.
Example 4 - Tear Pages Tab

To add a cover to an EXISTING Brochure:
- Click on the View Tab.
Example 1 - View Tab

- Click on the Export Button and select the Brochure Tab.
Example 2 - Export Button

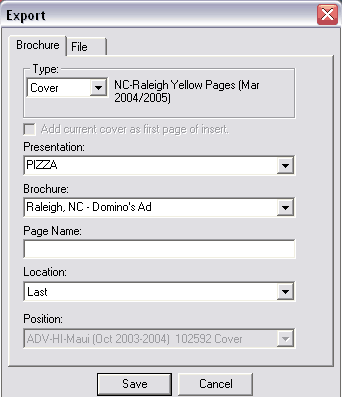
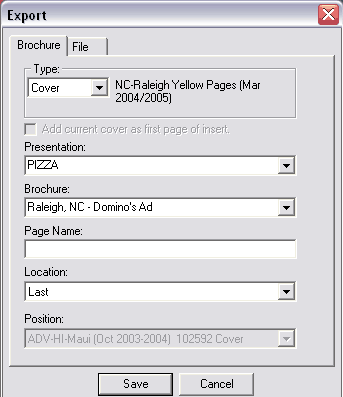
- Select Cover under Type.
Example 3 - Adding a Cover

- Select the specific Presentation by using the drop-down. The Brochure field will pre-populate. The user will still need to enter in a Page Name and select the order you would live the cover to appear. Example: First, Last, Before, After)
Example 4 - Select Specific Presentation

- Click on the SAVE Button and the Cover can be reviewed by clicking on the Tear Pages Tab.
Once the cover is in the brochure, the user can:
- Add another content page or heading from either the same book or another book and section.
- Export that heading to and Adobe PDF document or JPEG.
back to index
